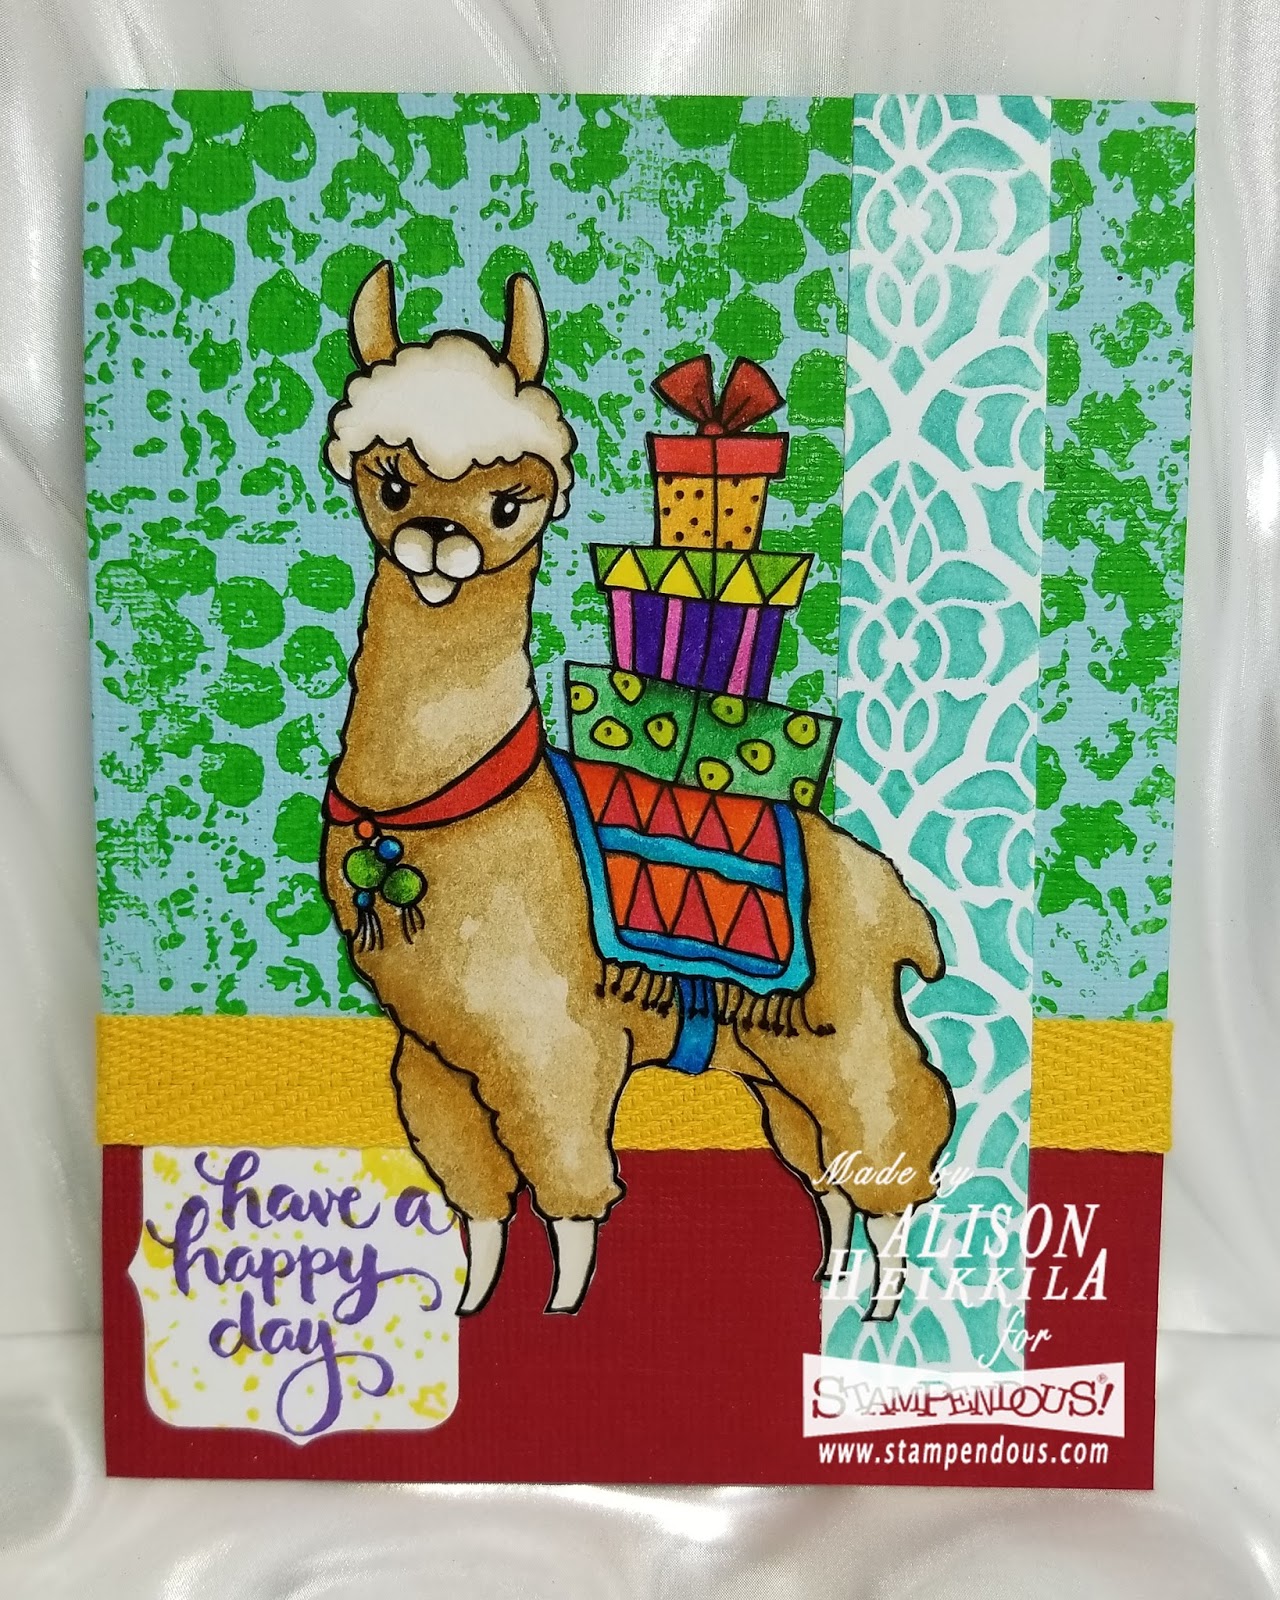
Greetings! This week, the Stampendous team is super excited to share sneak peeks from the upcoming April 2018 product catalog. I'm sharing what may be my favorite project that I created for this catalog, which features Llama Delivery.

Supplies:
Stampendous:
P319: Llama Delivery
51839: Quest Texture Cube
FMS4086: Moroccan Mesh Metal Stencil
SSC1272: Brushed Wishes Sentiment Set
DCP1005: Fitted Frames Set A
DWNHB-18: 3/4" Stencil Brush
MPW811: Mixed Media White Paper
Other:
My Colors Cardstock: Sky, Firecracker
Zig Clean Color Markers: 020, 022, 023, 031, 032, 041, 044, 048, 050, 052, 053, 064, 070, 072, 084, 202, 260
Creative Impressions: 80504- Mustard Blank Twill
Imagine: VersaFine Ink in Onyx Black, VersaMagic in Turquoise Gem, Memento Ink in Grape Jelly, Dandelion, Tear It! Tape
Scrapbook Adhesives: E-Z Runner
Canson Mixed Media Paper
Dylusions: Paint in Cut Grass
Fan Brush

Directions:
1. Stamp Llama Delivery with VersaFine Ink on to Mixed Media Paper.
2. Color image using the markers listed and fussy cut.
3. Create the card base out of Sky cardstock, cut to the size of 4 1/4" x 11" to create a top-folding notecard.
4. Using a fan brush, apply Cut Grass Dylusions Paint to the Bubble Wrap Side of the Quest Cube.
5. Stamp the Quest Cube on to the card base and cover the background. Let dry.
6. Cut a piece of Firecracker cardstock to the size of 4 1/2" x 1 3/4."
7. Attach Firecracker piece to the bottom of the card base.
8. Cut a piece of Twill to wrap around your base slightly, approximately 6."
9. Adhere the Twill to the base, overlapping the edge of the Firecracker cardstock, with Tear It! Tape. Be sure to wrap the Twill around the edges.
10. Cut a strip of Mixed Media Paper 3/4" x 5 1/2."
11. Apply VersaMagic in Turquoise Gem on to the strip through the Moroccan Stencil with the Stencil Brush.
12. Tear one short end off of the stenciled strip.
13. Adhere the strip to the right side of the card.
14. Stamp a sentiment in Grape Jelly Memento ink to a piece of Mixed Media Paper.
15. Die cut the sentiment with the Large A Fitted Frame.
16. Stamp the Ink Splatter side of the Quest Cube with Dandelion Memento Ink on to the die cut sentiment.
17. Adhere the sentiment to the left side of the card, on the Firecracker cardstock, tucking the top under the Twill.
18. Adhere the llama to the card.

Please be sure to visit the rest of the Stampendous team all throughout the week to see more sneak peeks. Heading over to the Stampendous Blog will get you started. Thanks for stopping by. Have an inspiring day!
Comments
Sue in Ohio
blanket. Beautiful coloring.
thanks for sharing
txmlhl(at)yahoo(dot)com
Illinois
pretty colors of the presents. Lovely card.
Thanks for sharing...
Thanks for sharing...