Hello! We're finally really feeling Spring in New York, and I am so happy about it. I'm not a fan of the cold at all, and seeing the flowers begin to pop out of the ground makes me feel so good. The beautiful weather we've been having really inspired my shaker card for today. Also, I've been really loving the rainbow backgrounds that Laura Bassen makes, so she also inspired me.
 I knew I wanted to make a shaker, so I began to play with different elements. First, I colored these chicks from the Simply Celebrate stamp set from Lawn Fawn, and I fussy cut them. I colored them with Zig Clean Color Markers, and the colors I used helped me to choose what Distress Oxides I would use for my background. These colors also helped me to choose which Sparkle Blend(s) from Doodles Paper Playground that I wanted to use, which turned out to be Easter Basket with a little bit of Springtime.
 I thought the Petals Background stencil from Stampendous went really well not only with the chicks, but the Sparkle Blends too. I used Wilted Violet, Picked Raspberry, Worn Lipstick, Mustard Seed, Twisted Citron, Cracked Pistachio, and Tumbled Glass Distress Oxides with Mini Ink Blending Tools. The rainbow these colors created is just beautiful, and I will need to use this combination again. You can see in the photo above the soft, pretty colors and fun shapes in the Sparkle Blends. Look at the little bunny heads and swirls!
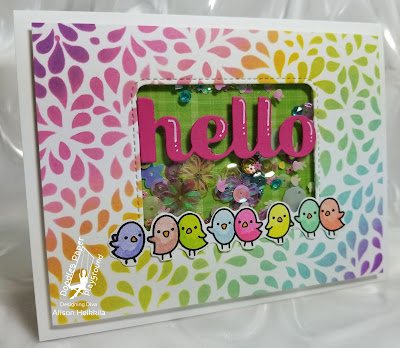 The window was created with a Lawn Fawn die from the Magic Color Slider Die set, and I backed the shaker window with a piece of Lawn Fawn cardstock from the Really Rainbow 6" x 6" pack. I topped the window with a Sugar Script "hello" die cut from Birch Press. I loved pulling together all of these elements and colors. I think this finished card is adorable.
 As a reminder, Doodles Paper Playground came out with 6 new Sparkle Blends this month. If you haven't checked them out, you can go back to view previous blog posts here, as well as going to the White Rose Crafts LLC shop. If you use my code, "Alison 15" you'll get 15% off of your order. White Rose Crafts is the exclusive retailer for Sparkle Blends. I'll be back tomorrow with another post. Thanks so much for stopping by. Have an inspiring day!


Comments