
Tote-ally Fun with Canvas Corp & Stampendous!

Hello! All week long, the Stampendous Design Team has been sharing their makes with a fun little tote bag from Canvas Corp. I have to tell you, I love this little bag. Not only because it is a little blank canvas, but also because it is the perfect size for my phone and a couple of other small little things that I usually have in my pockets. I have been needing a tote like this for the days when I don't have pockets, and this baby fits the bill! I am so excited to start using it.


We've got prizes to give away! You know you want in on them, so please check out the Official Rules. And, before I share my project with you, are are the links to visit Canvas Corp:
Canvas Corp website: http://canvascorp.com/
Facebook: http://www.facebook.com/canvascorp


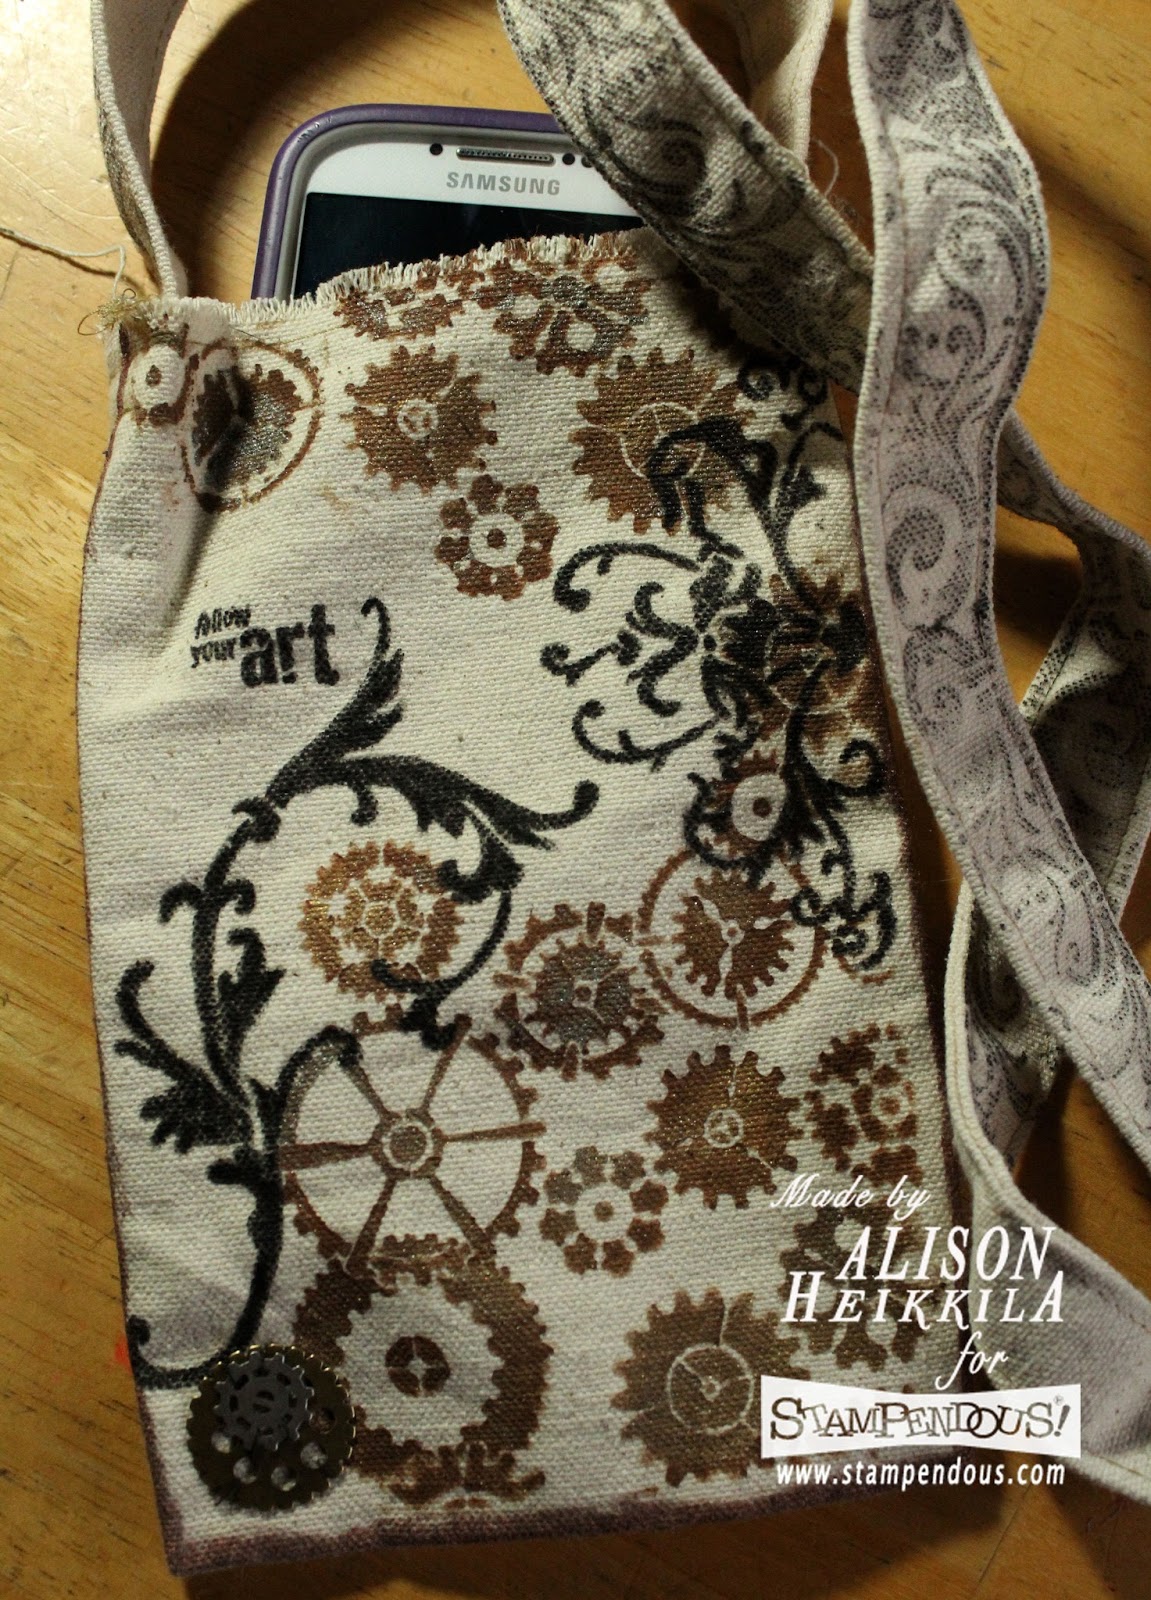
I steampunked my tote. I started ff with the Gears stencil taped to my tote. Also, I added a thick acrylic block to the inside of the tote so that the seams wouldn't be in the way, and I would have more stability.

I masked off some of the gears that I didn't want to use with my tape too. Then I applied Nutmeg colored Acrylic paint with my 3/8" Stencil Brush, keeping the brush vry dry so that the paint would not run under the stencil.

After I finished that layer, I used a bit of metallic gold and green, right on top of the brown. It added just a it of shimmer and shine.

Next, I stamped one of the images from the Cling Filigree Stamp Set using black VersaCraft ink from Imagine Crafts. It didn't come out as dark as I had hoped (totally my fault, not the products), so I went over the stamped image with Fabrico Dual marker, also from Imagine Crafts/Tsuineko.

It was a very fast process because the marker works so well. I repeated this process to add more gears, and another Filigree image to my bag.

I also used a copper paint marker to add a border around the edge of the tote. I had one more Filigree stamp to play with, so I used it around the strap. This time though, I didn't fill it in with the Fabrico marker. I liked that it looked a little worn out. I also added the "Follow Your Art" stamp from the Charmed Art Perfectly Clear Set. It still needed a little something else, so I added 2 little gears to the bottom left corner. I stitched them on.

It was a simple and quick project, and I have lots of ideas to make more! Please be sure to visit the other Stampendous folks that are hopping along today. Their links are below. Thanks for stopping by. Have an inspiring day!

Comments

Ina Good saidā€¦
fun steampunk gears bag!
craftymom205 saidā€¦
Love the bag. Love the colors.

craftymom205 at yahoo dot com
Anonymous saidā€¦
Very creative bag!
Unknown saidā€¦
The steampunk look works perfectly
Laura S Reading saidā€¦
And the bag is a perfect size for Steampunk outtings!
Great stencil and perfect colorations.
Mary Holshouser saidā€¦
Love this.
It's elegant while being steampunk too.
thanks for sharing a beautiful bag.
Illinois
Pam Hornschu saidā€¦
I love how this turned out, Alison! It also reminded me to break out my Fabrico markers again. Lol.
barbara macaskill saidā€¦
LOVE the gears with the filigree! Totally opposite ends of the spectrum but they go so well together!!! TFS!
cghundley saidā€¦
How cute and spiffy
this looks! Love
the gears you stenciled
and sewed on.
Carla from Utah
Stampendous saidā€¦
Completely AWESOME! Wow, this is just crazy cool steampunk style. Love the filigree moves serendipitous around the gears. TOTE-ally cool project, thank you for sharing today!
Pammejo saidā€¦
Fabulous steampunk bag...love it!!!
Viki Banaszak saidā€¦
OMG!!! Steam punky goodness!!! I love the gears and the design on the strap too. Viki in Kansas
Becca Yahrling saidā€¦
This is really cool. I love steampunk.
SewPaperPaint saidā€¦
Those black swirls really pop here!
Unknown saidā€¦
Very artistic and awesome. Your bag is for me.
Regards from Down Under
Unknown saidā€¦
Very artistic and awesome. Your bag is for me.
Regards from Down Under
Unknown saidā€¦
very artistic and awesome. Your bag is for me.
Regards from Down Under
Sue D saidā€¦
Love the gears and colors.
Sue in Ohio
Stampendous saidā€¦
Your design could even work as a "man-purse". Love the gears and flourishes. Great color combo as well. Thanks for sharing your talent with us for Dreamweaver Thursday!
Jade saidā€¦
I love your gear bag. How perfect for your gear! Too cute and great job.
Jean Bullock saidā€¦
What a great job you did on this bag. Very cool! the gears look great. Thanks so much for sharing the process. Excellent tutorial.
Marianne B in AZ saidā€¦
Your bag is great! It doesn't look like anything that could have been done quickly, but I'll take your word for it šŸ˜‰
Helen Gullett saidā€¦
What a groovy amd cool bag!!
Jean saidā€¦
This is such fun! Love the colors!!
Jean saidā€¦
Love the bag! Thanks for the great tutorial on how you did it!
Katie saidā€¦
Cool design! Love the added gears. So many great ideas here! Thanks for sharing.

Katie B. (USA)
D.Ann C saidā€¦
Nice bag for your GEAR! : ) FL
TracyM #6773 saidā€¦
SERIOUSLY AWESOME bag!!!
LOVE your gears against the flourishes, LOVE your colours too!!!
THANK YOU for sharing :)
Shari saidā€¦
Awesome tote. I love the steampunkiness of it. (it's a word!! now) Thanks so much for sharing. ā™„
Laurie2cats saidā€¦
Lovely bag, nice touch to add the metal gears.

Popular posts from this blog

February Smeared & Smudged Sketch Challenge

The new Smeared & Smudged challenges are up and ready for you to participate in! I got instantly inspired by Kelliā€™s card sketch for the month, as I have been working with different ideas for my next ā€œTarot Card.ā€ Haha! Thatā€™s actually pretty funny! If youā€™ve been checking in over the past couple of weeks, you may have seen my Misty Benson Tarot Set 1 ( Smeared Ink ) cards. Iā€™ve used The World and The Fool so far. Today, I bring you Death. Donā€™t worryā€¦itā€™s actually a joyful imageā€¦one that I intend to use a lot! First, hereā€™s the sketch. I flipped it and changed the ribbon and embellishment a bit. Can I just start off by saying that it is quite nerve wracking to slice your image??? I have done it a few times in the past, but I always get butterflies when I attempt it again. I colored the image and the card itself using nothing but Distress Inks and my Cut-n-Dry Nibs. My skull button at the top has been colored with Alcohol Inks.   The colors look a little off ...

Our Favorites: ADfD Blog Hop

***Sorry for the late posting....Blogger doesn't always play nice! Today is the first day of our  ADFD Blog Hop  - a celebration of all of the beautiful images Tammy has created over the years. As a special surprise for Tammy, we have a combination of current and former DT members participating in the hop. Her inspiring art and generous heart have touched us all. We want to take a moment to show our gratitude and thank Tammy for the blessings and joys we have received as members of the ADFD DT. Our theme is ā€œA Collection of ADFD Favoritesā€ - so each DT memberā€™s blog you visit will share something she has created with one of her favorite ADFD images.  The hop has   hidden prizes  - a commenter from each hidden prize stop will win a choice of one image from the ADFD Shop ! You wonā€™t know where the prizes are hidden, so be sure to leave a comment at each stop of the Hop!  Our Blog Hop will run from 7:00 a.m. eastern standard time on Saturday, February 25,...

House Mouse Hop: Nurse Mouse

Hello! I am excited to bring you my first of two posts today. This post is for the House Mouse & Friends Blog Hop. My second will be for Aurora Wings. You can click HERE to see that post. But don't leave yet! Read to the bottom of my post to find out how you can have a shot at winningMy House Mouse project features the adorable Nurse Mouse stamp. My full instructions and supply list is below. Supplies: Stampendous : HMP62 : Nurse Mouse DWLX7026 : Chevron Stencil STF082: VersaFine Onyx Black Ink Others : My Colors Cardstock : Ocean Side Zig Clean Color Markers: 010, 020, 024, 028, 029, 050, 052, 064, 065, 069, 071, 072, 090, 091, 092, 094, 095, 096, 098, 222, 260, 302, 900, 901, 902 Imagine: Silver irRESISTable Pico Embellisher, StazOn White Opaque, Sponge Dauber Canson Mixed Media Cardstock Ranger: Water Brush Beacon Adhesives : Zip Dry Glue Red Cardstock: unknown Directions: 1. Stamp the image with VersaFine on to Mixed Media paper. This paper holds wa...