
Tote-ally Fun with Canvas Corp & Stampendous!

Hello! All week long, the Stampendous Design Team has been sharing their makes with a fun little tote bag from Canvas Corp. I have to tell you, I love this little bag. Not only because it is a little blank canvas, but also because it is the perfect size for my phone and a couple of other small little things that I usually have in my pockets. I have been needing a tote like this for the days when I don't have pockets, and this baby fits the bill! I am so excited to start using it.


We've got prizes to give away! You know you want in on them, so please check out the Official Rules. And, before I share my project with you, are are the links to visit Canvas Corp:
Canvas Corp website: http://canvascorp.com/
Facebook: http://www.facebook.com/canvascorp
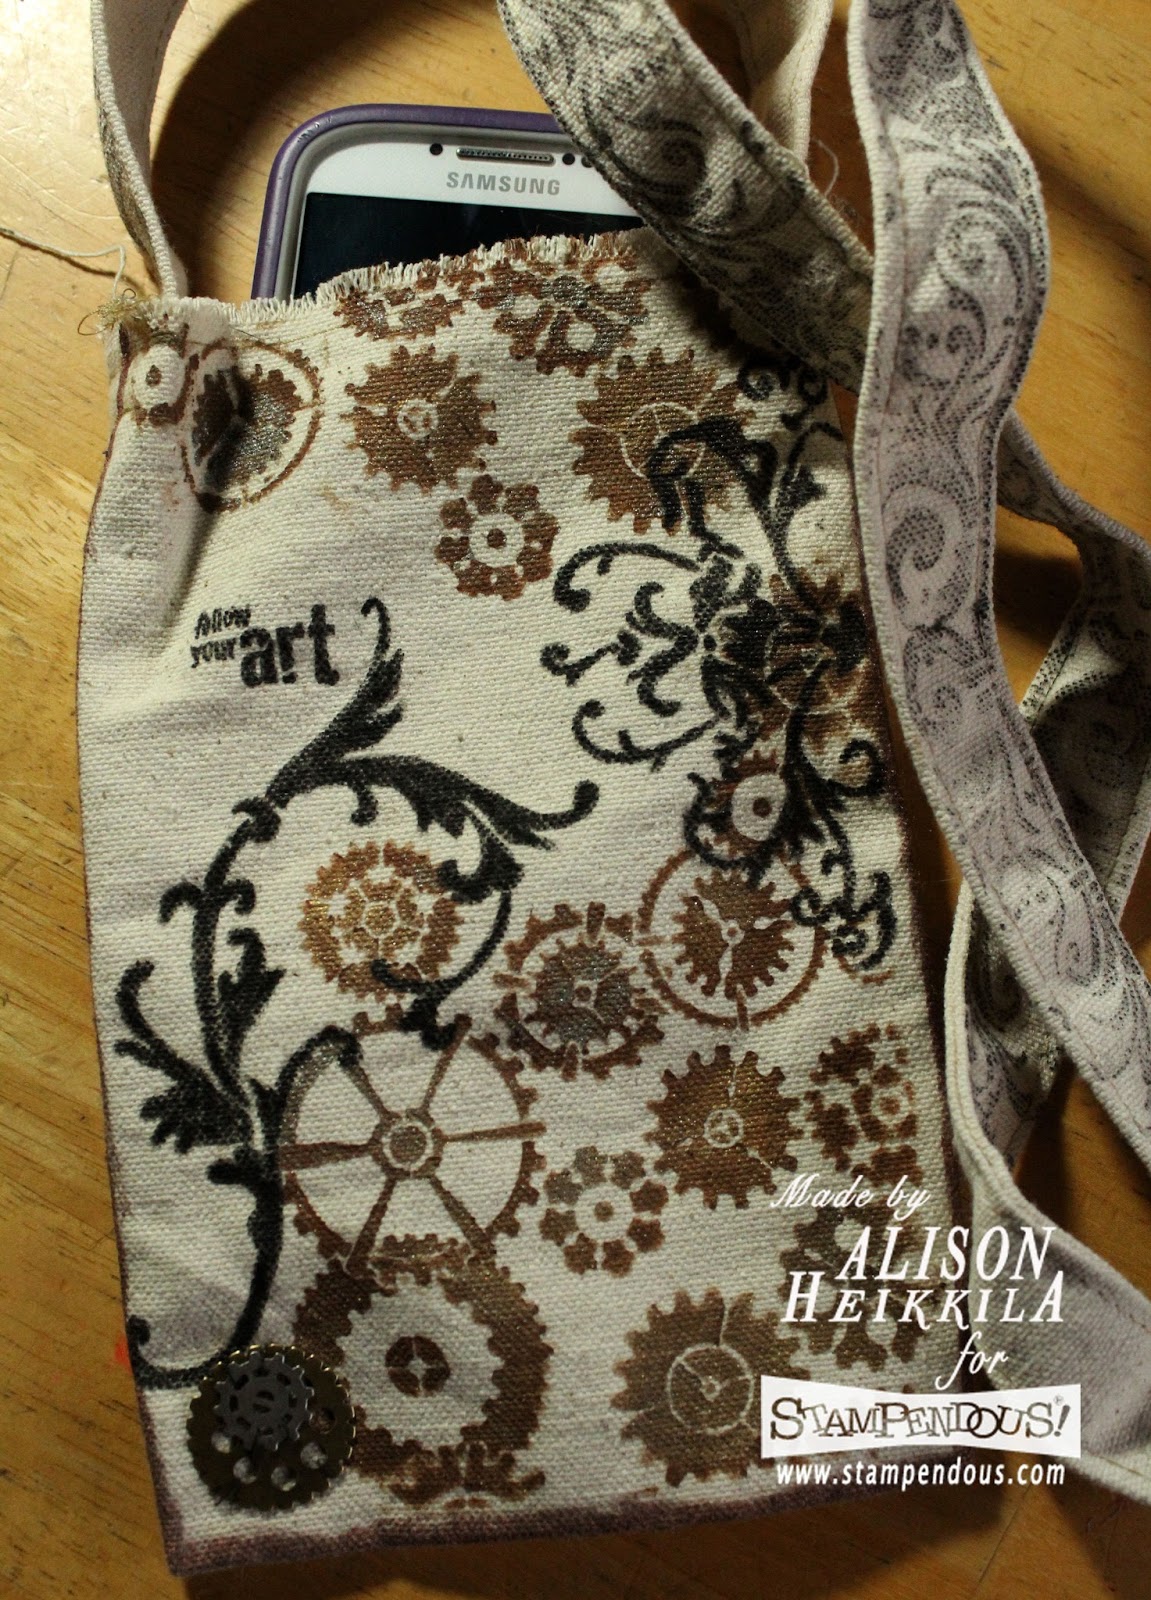

I steampunked my tote. I started ff with the Gears stencil taped to my tote. Also, I added a thick acrylic block to the inside of the tote so that the seams wouldn't be in the way, and I would have more stability.

I masked off some of the gears that I didn't want to use with my tape too. Then I applied Nutmeg colored Acrylic paint with my 3/8" Stencil Brush, keeping the brush vry dry so that the paint would not run under the stencil.

After I finished that layer, I used a bit of metallic gold and green, right on top of the brown. It added just a it of shimmer and shine.

Next, I stamped one of the images from the Cling Filigree Stamp Set using black VersaCraft ink from Imagine Crafts. It didn't come out as dark as I had hoped (totally my fault, not the products), so I went over the stamped image with Fabrico Dual marker, also from Imagine Crafts/Tsuineko.

It was a very fast process because the marker works so well. I repeated this process to add more gears, and another Filigree image to my bag.

I also used a copper paint marker to add a border around the edge of the tote. I had one more Filigree stamp to play with, so I used it around the strap. This time though, I didn't fill it in with the Fabrico marker. I liked that it looked a little worn out. I also added the "Follow Your Art" stamp from the Charmed Art Perfectly Clear Set. It still needed a little something else, so I added 2 little gears to the bottom left corner. I stitched them on.

It was a simple and quick project, and I have lots of ideas to make more! Please be sure to visit the other Stampendous folks that are hopping along today. Their links are below. Thanks for stopping by. Have an inspiring day!

Comments

Ina Good said…
fun steampunk gears bag!
craftymom205 said…
Love the bag. Love the colors.

craftymom205 at yahoo dot com
Anonymous said…
Very creative bag!
Unknown said…
The steampunk look works perfectly
Laura S Reading said…
And the bag is a perfect size for Steampunk outtings!
Great stencil and perfect colorations.
Mary Holshouser said…
Love this.
It's elegant while being steampunk too.
thanks for sharing a beautiful bag.
Illinois
Pam Hornschu said…
I love how this turned out, Alison! It also reminded me to break out my Fabrico markers again. Lol.
LOVE the gears with the filigree! Totally opposite ends of the spectrum but they go so well together!!! TFS!
cghundley said…
How cute and spiffy
this looks! Love
the gears you stenciled
and sewed on.
Carla from Utah
Stampendous said…
Completely AWESOME! Wow, this is just crazy cool steampunk style. Love the filigree moves serendipitous around the gears. TOTE-ally cool project, thank you for sharing today!
Pammejo said…
Fabulous steampunk bag...love it!!!
Viki Banaszak said…
OMG!!! Steam punky goodness!!! I love the gears and the design on the strap too. Viki in Kansas
Becca Yahrling said…
This is really cool. I love steampunk.
SewPaperPaint said…
Those black swirls really pop here!
Unknown said…
Very artistic and awesome. Your bag is for me.
Regards from Down Under
Unknown said…
Very artistic and awesome. Your bag is for me.
Regards from Down Under
Unknown said…
very artistic and awesome. Your bag is for me.
Regards from Down Under
Sue D said…
Love the gears and colors.
Sue in Ohio
Stampendous said…
Your design could even work as a "man-purse". Love the gears and flourishes. Great color combo as well. Thanks for sharing your talent with us for Dreamweaver Thursday!
Jade said…
I love your gear bag. How perfect for your gear! Too cute and great job.
Jean Bullock said…
What a great job you did on this bag. Very cool! the gears look great. Thanks so much for sharing the process. Excellent tutorial.
Your bag is great! It doesn't look like anything that could have been done quickly, but I'll take your word for it 😉
Helen Gullett said…
What a groovy amd cool bag!!
Jean said…
This is such fun! Love the colors!!
Jean said…
Love the bag! Thanks for the great tutorial on how you did it!
Katie said…
Cool design! Love the added gears. So many great ideas here! Thanks for sharing.

Katie B. (USA)
D.Ann C said…
Nice bag for your GEAR! : ) FL
TracyM #6773 said…
SERIOUSLY AWESOME bag!!!
LOVE your gears against the flourishes, LOVE your colours too!!!
THANK YOU for sharing :)
Shari said…
Awesome tote. I love the steampunkiness of it. (it's a word!! now) Thanks so much for sharing. ♥
Laurie2cats said…
Lovely bag, nice touch to add the metal gears.

Popular posts from this blog

Holiday Hop and Collaboration: Day 5

Hello!  All of this week, the  Stampendous  and  Dreamweaver  teams have been playing with a mix of their products, along with some wonderful, SAND-ABLE papers from  Core'dinations . We've sanded our way to the "core" of all things Christmas and the Holiday season. ***If you are looking for my Day 17 post for the 31 Days of Halloween, please scroll down to my next post.*** Of course, there are prizes, and we are giving away the best...this time with a mix of fun  Core'dinations products as well. To be one of three prize package winners, follow the posted link lists from each day, leave comments, and winners will be selected from these comments at the beginning of next week.  I've been sharing a few car featuring the Stampendous set, Forest Friends . It's such a sweet set. I was going through my Dreamweaver Stencils, and I came across the Open X-Mas Tree . Then it came to me. Remember the part in Rudolph the Red-Nosed Reindeer, when the song Silv...

SBS and MIC Collaboration: Day 2!

It's Day 2 of the totally rad Simply B Stamps and Make it Crafty collaboration! If you missed anything yesterday (though I don't know how ya could have missed this!), below is all the info you need to know.  Make it Crafty and Simply Betty Stamps are really excited to be bringing you the combined Hollywood Release! Simply Betty Stamps has a range of characters from Betty Monroe, through to Action Chris the movie director!! Make it Crafty has a range of background scenes perfect to switch and match with your famous characters!! Of course we are going to have heaps of fun with this theme and June 1st & June 2nd we will be showcasing our stuff and then June 3rd we're bringing you a fun guessing game... Will you be able to guess the movie??  We'll be giving you some clues to help!! Join us for the two inspiration days and leave a comment along the way for your chance to win a selection of new images. There will be FOUR winners each day recei...

Echo Park Blog Hop with Imagine

Greetings! This is my second post for the day. This one is not part of the 31 Days of Halloween, but rather a super-duper blog hop that the Artists in Residence for Imagine are doing with Echo Park . So if you're here for my Day 7 project, please check out the post HERE . But before you do that, scroll on to check out this one. There are prizes up for grabs, so be sure to check out the Imagine Blog as well as the Echo Park Blogs for details. I created my background by applying Dandelion and Tangelo Memento Ink to my brayer. Then I sprayed it with Ink Potion No. 9 to help the colors blend and to act as an extender to keep the inks wet longer. After I rolled the colors out on to watercolor paper and let it dry, I stamped the lovely doily-like image from Echo Park's Simply Sweet Stamp Set with Grape Jelly Memento. I also received the super pretty Heart Doily Designer Die  which I used with a true purple cardstock. But it needed something....and in rolls the super fabul...