Greetings! So, Valentine's Day was 9 days ago at the time of this post, but I never had a chance to share the cards I made for my family. I am not a fan of V-Day, and I usually wait until the last minute to make cards for it. Besides the chocolate, it's just not my thing. And really, I prefer the day after Valentine's Day when the chocolate is on sale. ;) Anyway, I made a card for my husband, and each of my children. Here's the card for my hubs.
 I used the amazing and funny "As You Wish" stamp set from Ink Road Stamps for his card. Did you know I named this set? I started off with a monoprint that I made ages ago with a Electric Pink Radiant Neon and Golden Glitz Delicata reinkers from Imagine. As I was designing this card, I thought that the monoprint needed a little something more, so I used a Tim Holtz stencil with Barn Door Distress Oxide, to give it a bit of a sun ray effect.
 Then I stamped the Princess and Robin with VersaFine Clair ink on to the monoprint. I added it to a cream card base and stamped my sentiment. I needed some finishing touches, so I applied some washi tape from Queen and Co. and a few stunning Max Red Half Gems.
 I love the shine from the Golden Glitz reinker with the washi tape and Max Red jewels. What's funny is that my husband considered using this same set when he was making a card for me for Valentine's Day.
 This is the card I made for my daughter. She loves big, bold colors and patterns so I knew I really wanted to use the "Full Circle" stamp set, also from Ink Road. I stamped the circles with Rose Bud, Grape Jelly, Love Letter, Elderberry, and Angel Pink Memento Ink from Imagine.
 I recently purchased a few Birch Press Design Sugar Script word dies, and my daughter really loved the font, so I chose to use the "hugs" for my sentiment, die cutting the top layer with Bo Bunny Vintage Dot cardstock to add a few more circles to the card. I also added 3 glitter sequins from Doodles Paper Playground for a touch of shine.

 So there you have it. Three very different cards for Valentine's Day. And I am happy to report that my family loved their cards. I liked using different techniques and styles for each of the cards. They unique, just like my family. Thanks so much for stopping by. Have an inspiring day!


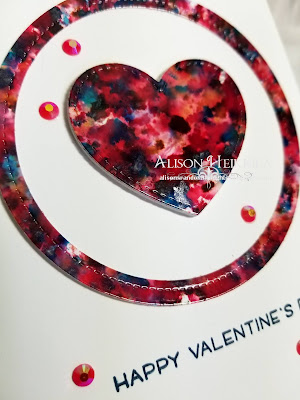
This is the card I made for my son. I had created this alcohol ink background a while ago, and decided it would be perfect for a Valentine's Day card. I die cut the alcohol ink piece with a Lawn Fawn Heart, and 2 Circles from Elizabeth Craft Designs.

I popped up the die cut pieces with foam tape, adding some dimensional interest on a very clean and simple card. I added a Lawn Fawn sentiment with Twilight VersaFine Clair ink, and I added some of those wonderful Max Red half gems (adhered with On Point Glue) that I used on my husband's card.

Comments